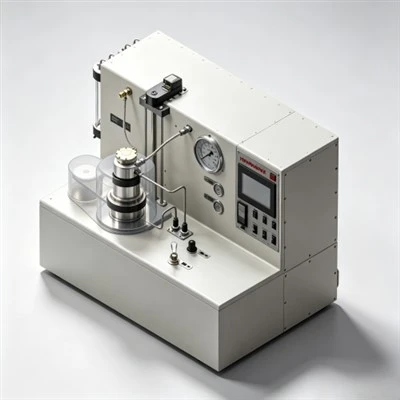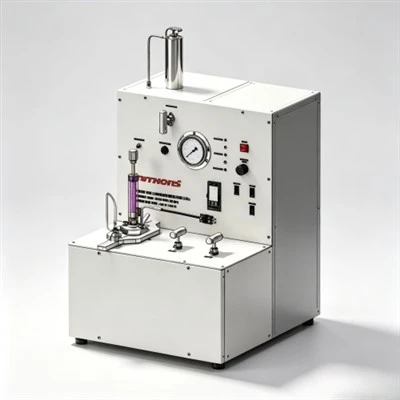


1. What Is an HTHP Fluid Loss Tester and What Is It Used For?
An HTHP Fluid Loss Tester is a laboratory instrument designed to measure the amount of liquid filtrate lost from cement slurry when exposed to high temperature and high pressure differential conditions. It is commonly used in oilwell cementing laboratories to evaluate cement slurry filtration control and fluid loss additive performance.
The HTHP Fluid Loss Tester simulates downhole conditions by applying controlled temperature and pressure to a cement slurry sample placed inside a high-pressure cell. The slurry is forced against a filter medium (usually filter paper). Filtrate is collected and measured over a standard test duration, commonly 30 minutes, to determine slurry fluid loss performance.
A cement lab uses an HTHP Fluid Loss Tester to:
- Evaluate cement slurry fluid loss behavior under simulated downhole conditions
- Verify performance of fluid loss additives
- Support slurry design optimization and dosage adjustment
- Generate quality control reports for cementing projects
- Meet API fluid loss testing requirements
Because filtration behavior is strongly influenced by temperature and pressure, using an HTHP Fluid Loss Tester is essential for deep well and high-temperature cementing projects.
2. What Tools and Materials Are Needed Before Running a Fluid Loss Tester?
Before operating an HTHP Fluid Loss Tester, laboratory technicians should prepare all necessary materials and tools. A complete preparation checklist helps avoid test interruptions and ensures smooth workflow.
Typical items needed include:
- HTHP Fluid Loss Tester cell assembly
- Heating jacket or heating chamber (depending on tester design)
- Pressure source (nitrogen or compressed gas system)
- Pressure regulator and gauges
- Filter paper (API standard recommended type)
- Cement slurry mixing equipment (API constant speed mixer)
- Measuring cylinder or collection cylinder for filtrate volume
- Timer or stopwatch for accurate time tracking
- Thermometer or temperature sensor calibration tool
- Cleaning brushes and cloths
- Seal grease or lubricant (if recommended)
- Spare O-rings and sealing gaskets
- Personal protective equipment (gloves, goggles, lab coat)
A well-prepared cement lab can run HTHP Fluid Loss Tester tests more efficiently, reducing operator error and improving result repeatability.
3. How to Prepare Cement Slurry Samples for HTHP Fluid Loss Tester Testing?
Slurry preparation is one of the most important steps when operating an HTHP Fluid Loss Tester. Even if the instrument is high quality, incorrect slurry mixing will cause inaccurate test results.
To prepare cement slurry for Fluid Loss Tester testing, follow these key practices:
Step 1: Confirm slurry formulation
Confirm cement type, water-to-cement ratio, and additive dosage. Always record all formulation details clearly.
Step 2: Measure materials accurately
Use calibrated scales and measuring cylinders. Small dosage errors can significantly affect fluid loss performance in a Fluid Loss Tester.
Step 3: Follow API mixing procedure
Use an API constant speed mixer and follow standard mixing speed and mixing time. This ensures slurry consistency and improves repeatability of Fluid Loss Tester results.
Step 4: Control slurry temperature
Ensure mixing water temperature is consistent. Water temperature affects hydration speed and may influence filtration behavior in the HTHP Fluid Loss Tester.
Step 5: Avoid air entrainment
Air bubbles may affect filtration rate and cause unstable fluid loss readings. Proper mixing technique is necessary.
Once slurry is mixed, proceed immediately to load the Fluid Loss Tester cell. Delays may cause hydration progress before the test starts, leading to inaccurate results.
4. How to Inspect the Fluid Loss Tester Cell Before Assembly?
Before assembling the HTHP Fluid Loss Tester cell, it is critical to inspect all components. Cell damage, worn seals, or contaminated surfaces may cause leakage and unstable pressure control.
Inspection steps include:
- Check the cell body for cracks or corrosion
- Inspect all O-rings and seals for wear, flattening, or cracks
- Confirm the filter paper support screen is clean and not blocked
- Check bolts, nuts, and threads for damage
- Ensure pressure inlet and outlet valves are functioning properly
- Confirm filtrate outlet tube is clean and unobstructed
If any component is damaged, replace it before operating the HTHP Fluid Loss Tester. Leakage during testing not only causes inaccurate results, but also creates safety risks due to high pressure conditions.
5. How to Assemble the HTHP Fluid Loss Tester Cell Step by Step?
Proper assembly of the cell is necessary for safe and reliable HTHP Fluid Loss Tester operation. The assembly sequence may vary slightly depending on model design, but the general procedure is similar.
Step 1: Install the bottom sealing gasket
Place the gasket or O-ring into the groove at the bottom cap. Ensure it is seated evenly without twisting.
Step 2: Install the filter support screen
Place the support screen into the bottom section. This supports the filter paper and prevents deformation under pressure in the Fluid Loss Tester.
Step 3: Install filter paper (see next section for detailed method)
Correct installation is critical to prevent bypass leakage.
Step 4: Install the top sealing components
Check the top seal and ensure the surface is clean. Install the top gasket or O-ring properly.
Step 5: Tighten bolts evenly
Tighten the cell bolts in a cross pattern. Uneven tightening may cause seal deformation and leakage in the HTHP Fluid Loss Tester.
Step 6: Confirm all valves are closed
Before loading slurry, ensure the pressure inlet and filtrate outlet valves are in correct position.
Correct assembly ensures the Fluid Loss Tester can maintain stable high pressure without leakage during operation.
6. How to Install Filter Paper Correctly in a Fluid Loss Tester?
Filter paper installation is a critical detail in any Fluid Loss Tester procedure. Incorrect filter paper placement may cause leakage around the edges, resulting in abnormally high filtrate volume and invalid test data.
To install filter paper correctly in an HTHP Fluid Loss Tester:
Step 1: Select the correct filter paper type
Use API standard filter paper recommended for cement slurry fluid loss testing.
Step 2: Ensure filter paper is clean and undamaged
Do not use wrinkled, torn, or contaminated filter paper.
Step 3: Place filter paper flat on the support screen
Ensure it is centered and covers the filtration area completely.
Step 4: Avoid folds or air gaps
Any fold can create bypass channels. The filter paper must sit flat to ensure accurate Fluid Loss Tester filtration measurement.
Step 5: Confirm proper sealing contact
The filter paper edges must be pressed properly by the sealing structure to prevent bypass flow.
Correct filter paper installation improves repeatability and ensures the HTHP Fluid Loss Tester measures true filtrate loss rather than leakage flow.
7. How to Load Cement Slurry into the Fluid Loss Tester Safely?
After assembling the filtration section, slurry must be loaded into the cell. This step should be done quickly but carefully to avoid spills, air trapping, or contamination.
Steps to load slurry into the HTHP Fluid Loss Tester:
Step 1: Stir slurry gently before loading
Cement slurry may start settling quickly. Gentle stirring ensures uniform consistency before loading into the Fluid Loss Tester.
Step 2: Pour slurry into the cell slowly
Pour carefully to avoid introducing air bubbles. Air bubbles may affect filtration behavior and test repeatability.
Step 3: Fill to the correct level
Do not overfill. Overfilling may block pressure chamber volume and cause unstable pressure conditions in the HTHP Fluid Loss Tester.
Step 4: Clean excess slurry from sealing surfaces
If slurry contaminates sealing surfaces, leakage may occur. Wipe surfaces clean before final closure.
Step 5: Close and seal the cell
Install the top cap and tighten bolts evenly.
Once slurry is loaded, proceed to heating and pressurizing steps immediately. Cement hydration begins quickly, and delays can affect Fluid Loss Tester results.
8. How to Set Temperature for HTHP Fluid Loss Tester Testing?
Temperature setting is a key part of HTHP Fluid Loss Tester operation. Temperature influences slurry viscosity, hydration speed, and fluid loss additive performance. Many fluid loss additives perform differently at elevated temperatures.
To set temperature properly:
Step 1: Confirm target test temperature
Target temperature should match expected downhole circulating temperature conditions or customer requirements.
Step 2: Start the heating system
Turn on the heating jacket or heating chamber and set the desired temperature on the control panel.
Step 3: Allow temperature stabilization
Wait until the Fluid Loss Tester cell reaches stable temperature before applying pressure. If pressure is applied too early, results may not reflect real filtration performance at target temperature.
Step 4: Monitor temperature during test
During the 30-minute test period, ensure temperature remains stable. Temperature fluctuation can cause inaccurate filtration rate changes in the HTHP Fluid Loss Tester.
Proper temperature control is essential for producing reliable and repeatable Fluid Loss Tester test results, especially for high-temperature cement slurry systems.
9. How to Apply Pressure in an HTHP Fluid Loss Tester Correctly?
Pressure application is the core of HTHP Fluid Loss Tester operation. Pressure drives the filtration process, forcing liquid through the filter medium. Incorrect pressure control can cause unstable results or safety hazards.
To apply pressure correctly:
Step 1: Confirm pressure system readiness
Ensure nitrogen cylinder or compressed gas source is connected properly. Check regulator condition and confirm pressure gauge accuracy.
Step 2: Apply pressure gradually
Increase pressure slowly to avoid sudden shock. Sudden pressure may damage filter paper or cause seal failure in the Fluid Loss Tester.
Step 3: Stabilize at target pressure
Hold pressure at the required test value. Most API fluid loss tests require stable differential pressure. The HTHP Fluid Loss Tester should maintain this pressure consistently.
Step 4: Check for leakage
Inspect all seals and connections. If leakage is observed, stop the test and fix the sealing issue immediately.
Stable pressure is critical because fluid loss volume is directly related to differential pressure. A professional HTHP Fluid Loss Tester should provide smooth pressure regulation for repeatable results.
10. How to Collect and Measure Filtrate During Fluid Loss Tester Operation?
Once temperature and pressure conditions are stabilized, filtrate collection begins. Filtrate volume measurement is the final key output of the Fluid Loss Tester test.
Steps for filtrate collection:
Step 1: Prepare measuring cylinder
Use a clean, calibrated cylinder to collect filtrate from the outlet tube.
Step 2: Start timing immediately
Start the stopwatch once pressure is applied and filtrate begins flowing. Accurate timing is critical in Fluid Loss Tester testing.
Step 3: Monitor filtrate flow rate
Observe flow stability. Sudden fluctuations may indicate filter paper damage, bypass leakage, or slurry instability.
Step 4: Collect filtrate continuously
Ensure no filtrate is lost outside the cylinder. Any loss leads to inaccurate results in the HTHP Fluid Loss Tester.
Step 5: Record final volume at test completion
After 30 minutes (or required duration), record the collected filtrate volume accurately.
Correct collection ensures accurate reporting of HTHP Fluid Loss Tester results for cement slurry evaluation and quality control documentation.
11. How to Calculate API Fluid Loss Results from a Fluid Loss Tester?
After collecting filtrate volume, results must be calculated according to the standard reporting method. Most cement laboratories report fluid loss as mL per 30 minutes under specified temperature and pressure conditions.
The simplest calculation method is:
Fluid Loss (mL/30 min) = Total filtrate volume collected during 30 minutes
In some procedures, correction factors may apply depending on test design or filter area. Cement laboratories should follow API standards or internal company procedures when calculating Fluid Loss Tester results.
In a professional test report, the following should always be recorded:
- Cement type and slurry formulation
- Additive types and dosage
- Water-to-cement ratio
- Test temperature
- Test pressure differential
- Filter paper type
- Total filtrate volume after 30 minutes
- Observations (cake condition, slurry stability, leakage issues)
Accurate calculation and documentation improve quality control reliability and make Fluid Loss Tester data usable for field cementing decisions.
12. What Common Mistakes Should Be Avoided When Operating a Fluid Loss Tester?
Many fluid loss test failures are caused by operational mistakes rather than slurry design issues. Cement laboratories must standardize procedures to ensure consistent results.
Common mistakes include:
- Using incorrect or damaged filter paper
- Failing to clean the cell properly before testing
- Applying pressure too quickly, damaging filter paper
- Not stabilizing temperature before starting test
- Overfilling slurry, reducing pressure chamber volume
- Ignoring seal wear and causing leakage
- Measuring filtrate volume incorrectly due to uncalibrated cylinders
- Delaying slurry loading, allowing hydration to progress early
Avoiding these mistakes ensures the HTHP Fluid Loss Tester provides accurate and repeatable fluid loss results for cementing quality control.
13. How to Clean and Maintain an HTHP Fluid Loss Tester After Testing?
Cleaning and maintenance are critical because cement slurry hardens quickly. If cement residue is left inside the cell, it will damage seals, block filtration paths, and reduce equipment lifespan.
Post-test cleaning procedure:
Step 1: Release pressure safely
Before disassembly, ensure pressure is fully released. Never open the HTHP Fluid Loss Tester cell under pressure.
Step 2: Allow cell to cool down
Wait until temperature is safe to handle.
Step 3: Disassemble the cell carefully
Remove bolts and open the cell. Avoid damaging threads and sealing surfaces.
Step 4: Remove cement cake and filter paper
Dispose of used filter paper. Clean cake residue from the screen and surfaces.
Step 5: Wash all parts thoroughly
Use warm water and cleaning brush. Ensure all slurry residue is removed.
Step 6: Dry components completely
Drying prevents corrosion and extends seal life.
Step 7: Inspect seals and replace if needed
Seals are consumables. Replace cracked or flattened seals to maintain leak-free Fluid Loss Tester operation.
Proper maintenance ensures long service life and stable repeatability of the HTHP Fluid Loss Tester.
14. Checklist Table: Step-by-Step HTHP Fluid Loss Tester Operation Procedure
| Step | Operation Task | Key Notes for Fluid Loss Tester Accuracy |
| 1 | Prepare tools and PPE | Ensure safety and avoid interruptions |
| 2 | Mix cement slurry | Follow API mixing procedure |
| 3 | Inspect tester cell | Check seals, valves, and screen |
| 4 | Install filter paper | Must be flat and centered |
| 5 | Load slurry into cell | Avoid air bubbles and overfilling |
| 6 | Seal and tighten cell | Tighten evenly to prevent leakage |
| 7 | Heat to target temperature | Stabilize before pressurizing |
| 8 | Apply pressure gradually | Avoid shock pressure |
| 9 | Collect filtrate | Start timing immediately |
| 10 | Record volume after 30 min | Use calibrated cylinder |
| 11 | Release pressure safely | Never open cell under pressure |
| 12 | Clean and inspect parts | Replace seals if needed |
15. Conclusion: How to Ensure Reliable Results from a Fluid Loss Tester
Operating an HTHP Fluid Loss Tester correctly is essential for accurate cement slurry evaluation and cementing quality control. From slurry preparation and filter paper installation to temperature stabilization, pressure control, filtrate collection, and post-test cleaning, every step affects final fluid loss results.
A professional cement laboratory must standardize its HTHP Fluid Loss Tester procedure to improve repeatability and reduce operational errors. By following the step-by-step method described in this guide, engineers can generate reliable fluid loss data, optimize additive performance, and ensure cement slurry designs meet the requirements of high temperature and high pressure cementing projects.
If cementing quality control is a priority, then mastering HTHP Fluid Loss Tester operation is one of the most important laboratory skills for any cement testing team.
Checklist
Pre-Test Checklist (Before Using the Fluid Loss Tester)
- Confirm slurry formulation and additive dosage
- Prepare API mixer and mixing water
- Inspect seals and O-rings for damage
- Confirm filter paper and screen are clean
- Ensure pressure source is stable and regulator works properly
- Confirm measuring cylinder is calibrated
- Wear PPE (gloves, goggles, lab coat)
Test Operation Checklist (During Fluid Loss Tester Testing)
- Install filter paper flat and centered
- Fill slurry to correct level (do not overfill)
- Tighten cell bolts evenly in cross pattern
- Stabilize temperature before applying pressure
- Apply pressure gradually to avoid filter paper damage
- Start timing immediately when pressure is applied
- Collect filtrate carefully without loss
- Record observations of filtrate flow stability
Post-Test Checklist (After Fluid Loss Tester Testing)
- Release pressure completely before opening cell
- Allow the cell to cool down before disassembly
- Remove filter paper and cement cake immediately
- Wash and clean all parts thoroughly
- Dry all components to prevent corrosion
- Inspect seals and replace worn parts
- Store the Fluid Loss Tester cell properly for next test
- Record final fluid loss results in lab report system